
Beyond the Prompt: Why Magnific AI is the Secret to Pro-Level Video Finishes
Let’s be honest for a second: most raw AI video clips look a bit… flat. You spend an hour tweaking a prompt in Kling or PixVerse, and while the motion is great, the lighting often feels artificial, and the textures can get muddy the moment you upscale. We’ve all been there, looking at a 4-second clip that has potential but lacks that “wow” factor that makes a viewer stop scrolling. In the current landscape of digital creation, simply generating an image or a video is no longer the finish line. It is barely the starting block.
In my studio, I’ve realized that the “magic” doesn’t happen in the generator anymore. The real heavy lifting is now done in the post-production phase. If you want to move away from the “AI look” and toward a professional, cinematic aesthetic, you need to talk about the Magnific AI workflow. It’s the tool that finally bridges the gap between a tech demo and a finished piece of art. You can explore the platform at Magnific AI. It’s about taking control back from the algorithms and applying the intentionality of a traditional cinematographer to a digital medium.
Table of Contents
The Problem with “Raw” AI Generations
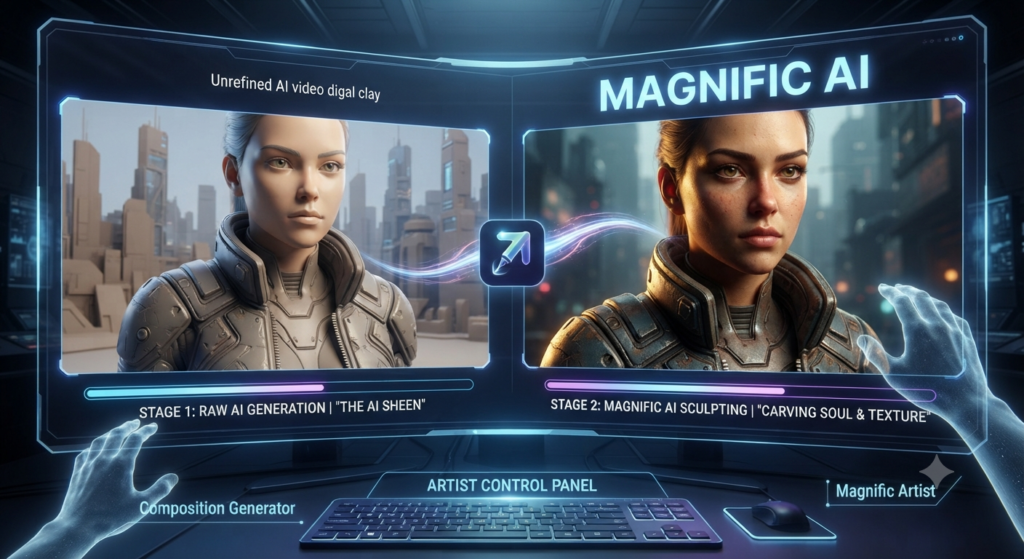
When we generate video in 2026, we’re essentially working with raw digital clay. Even the best models tend to struggle with consistent lighting across a scene. You might get a great character, but the background feels like a static cardboard cutout, or the skin textures look like smoothed plastic. This is often referred to as the “AI sheen”—that overly smooth, somewhat sterile look that immediately gives away the medium.
This is where a dedicated Magnific AI workflow changes the game. Instead of fighting the generator to give you the perfect light, you generate a solid base and then use Magnific to “carve” the details and light back in. It’s a shift in mindset. Instead of asking the AI to be the artist, you are using the AI as the ultimate brush. The generator provides the composition and the movement, but the Magnific AI workflow provides the soul, the texture, and the atmosphere.
Relighting: The Feature We’ve Been Waiting For
The biggest update to the Magnific AI workflow recently has been the Relighting tool. If you’ve ever worked on a real film set, you know that lighting is 90% of the mood. It’s the difference between a home movie and a Hollywood production. In traditional CGI, relighting a scene meant hours of re-rendering, adjusting global illumination, and tweaking light bounces.
With Magnific, you can actually reposition the light source after the video or image is generated. Want that sunset to hit the character’s face from a 45-degree angle instead of being washed out? You can do that. Want to add a moody, blue “rim light” to separate your subject from a dark background? It’s now a few clicks away. This tool allows for a level of creative direction that was previously impossible without a massive VFX budget.
This isn’t just adding a filter or a simple overlay. The AI actually understands the 3D geometry of your scene and recalculates how light should bounce off surfaces, how shadows should stretch across the floor, and how specular highlights should glint off metallic objects. For anyone serious about digital storytelling, this is the most significant shift in Magnific AI workflow history. It gives us back the power of “lighting for emotion,” which is something a generic prompt can rarely achieve on its own.
Upscaling Without the “Waxy” Look
We’ve all seen bad upscaling. It usually involves a lot of sharpening that makes everything look like it’s made of glass or, worse, a weird “waxy” texture where all the natural pores and imperfections are erased. What makes the Magnific AI workflow different is its “Creativity” and “Resemblance” sliders. These are the secret sauce of the platform.
When I’m upscaling a landscape or a complex character, I don’t just want more pixels; I want more information. Magnific adds fine details—the pores on skin, the weave in a fabric, the individual blades of grass, the subtle weathering on a brick wall—that weren’t there in the original low-res generation. It makes the final output look like it was shot on a high-end cinema camera with a premium lens rather than rendered on a remote server.
The key here is balance. A pro Magnific AI workflow involves finding that sweet spot where the AI adds enough detail to feel real, but not so much that it changes the fundamental character of the original image. It’s about enhancement, not replacement.
How to Integrate Magnific into Your Daily Routine
If you’re looking to improve your output, here is how I personally structure my Magnific AI workflow for maximum efficiency and quality:
1.The Base Generation: Start with your preferred video generator. I’m currently leaning toward MiniMax H3 for its natural motion or Kling for its sheer detail. Keep the prompt focused on movement, composition, and basic subject matter. Don’t over-complicate the lighting in the prompt—leave that for later.
2.The Keyframe Extract: Pull the most important frames from your video—usually the start, the middle, and the end, or any frame where the lighting needs to be specific.
3.The Magnific Pass: Run these frames through Magnific. Use the Relighting tool to set the mood. I often try three or four different lighting setups—dramatic side-lighting, soft top-lighting, or high-contrast noir styles—to see what fits the narrative best. Then, apply the Upscaler to lock in the textures.
4.The Re-Injection: Use an image-to-video tool or a specialized AI video editor to “animate” between these high-quality Magnific frames. This technique, often called “frame-guiding,” ensures that the cinematic look and the enhanced textures stay consistent throughout the entire clip.
5.Final Color Grade: Even after the Magnific AI workflow, I always do a final pass in DaVinci Resolve or Premiere. The Magnific output provides such a rich, detailed file that it handles color grading much like raw footage from a Blackmagic or RED camera.
Is It Worth the Investment?
I get asked this a lot by creators who are just starting out. Magnific isn’t the cheapest tool on the market, and it requires a bit of a learning curve to master the sliders. However, if you are doing client work, building a serious brand, or trying to break into the professional AI filmmaking space, it’s non-negotiable.
The time you save trying to “fix it in the prompt”—which is often an exercise in futility—is worth the subscription alone. More importantly, the quality jump is so significant that it places your work in a different league. In the world of AI video production, the goal is to make people forget they are watching something generated by a machine. A proper Magnific AI workflow is the best way I’ve found to add that human touch, that intentionality of light and texture that defines great cinematography.
The Future of Post-Production in AI
As we look further into 2026 and beyond, the role of the “AI Artist” is clearly evolving into the role of the “AI Technical Director.” We are no longer just consumers of what the model gives us. We are becoming curators and refiners. The Magnific AI workflow is just the beginning of a new wave of tools that focus on control rather than just generation.
We are seeing a convergence of traditional VFX techniques and generative AI. The ability to relight, re-texture, and upscale with such precision means that the barrier between “indie AI creator” and “pro studio” is thinner than ever. But this also means the bar for quality is higher. You can’t just post a blurry, flat generation and expect to stand out. You need the finish. You need the polish.

Final Thoughts
We are moving past the era where just “making a video with AI” is impressive. The novelty has worn off. Now, it’s about the quality of the vision and the execution of the craft. Tools like Magnific allow us to be directors again, not just prompt typists. They give us the tools to handle the nuances of light, shadow, and detail that speak to the human eye.
If you haven’t experimented with relighting yet, you’re leaving a lot of quality on the table. It’s one of those things where once you see the difference, you can never go back to raw generations. Give it a shot on your next project—take a clip you thought was “okay,” run it through a proper Magnific AI workflow, and move that first light source. You’ll see exactly what I mean the moment the scene comes to life.
Check out the other applications in AI Tools and find your next favorite tool that actually makes your work easier!